Plywood tabletops then to be noisy. The plywood should be covered with an insulating material before the track is laid. Homosote has been a very popular material over the years but my experience with homosote is that it absorbs moisture. This causes considerable expansion and contraction during layout construction as well as between humid summer and dry winter months. It is for this reason that I have found cork to be a much better overlay.
I have used a number of methods of building roadbed for model railroads over the years. This section will describe two methods that I have employed with the benefits of each. I prefer a combination of plywood and laminated roadbed when building a layout.
Plywood
The most basic tabletop can be constructed from 5/8″ (preferably 3/4″) plywood over grid benchwork. This is great for large areas such as yards and towns. Main line roadbed cut from plywood can present problems. It is difficult to maintain a very smooth grade without minor humps and bumps. The heavier the plywood, the more it has a mind of its own. Extra attention is required to make sure that all transitions from piece to piece are smooth. Additional bracing may be required to keep sections from sloping outward when used on a grade with a curve. Risers need to be closely spaced to prevent warping and sagging between supports.
Cork can be purchased in strips and smaller sheets from you local hobby shop. Home project stores may carry larger sheets of cork that can be cut to suit your layout. If you are hand laying track, the thickness of the cork should be calculated so that the spikes to NOT penetrate into the plywood. This is very important if you want a quiet operating layout. Now, there may be sceptics who think that cork is not dense enough to hold spikes. Well, you are partly correct. But, spiking every 4 to 6 ties works out very well once the ballast has been installed. The spikes will rust slightly in the ties and cork providing excellent grip once the water and glue have been applied to hold the ballast in place.
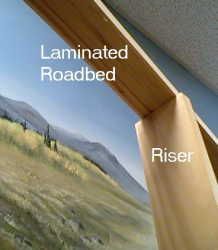
Laminated Spline
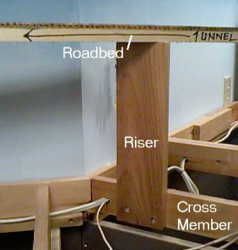
Laminated spline roadbed is probably the best roadbed anyone can install as long as you are willing to spend the time on construction. This is a very time consuming method but well worth the effort. The greatest benefits of splined roadbed is its extremely smooth transition from straight to curve and from flat to grade. Laminated roadbed is very strong and has very minimal flex once the glue has dried. Fewer risers are required with this method than are needed with plywood roadbed.
Material used for this type of roadbed should be clear pine carefully sawn into 3/16″ x 3/4″ strips. I have used as thin as 1/8″ and as thick as 1/4″. The 3/16″ material seems to be a nice compromise between workability and sawcut waste. Strips should be as long as reasonable, say in the 8′ range or so. Guides are either clamped to the table cross members or nails temporarily driven to give guidance to the finished shape. I use white carpenter’s glue to secure the strips together. It is during this phase that you will need a lot of clamps to hold everything while the glue dries. Install the risers and fasten the laminated roadbed in place. The top surface is finished by planing smooth to remove all irreglarities. Super elevated curves are a natural with laminated roadbed.
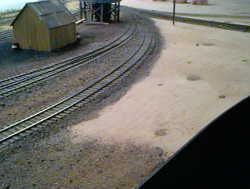
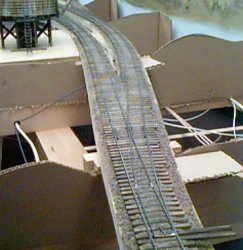
Fairly large amounts of material may have to be planed off to attain perfection. As seen in the picture below, laminated roadbed has very natural smooth transitons.
Once you are completely satisfied that you have very smooth roadbed, it is time to proceed to the trackwork section.
*Pictures taken on Lex Parker’s layout.